Introduction
Hey there, medspa owners! Today, we’re going to learn how to install a Facebook pixel and set up the Conversion API using Go High Level. This guide will walk you through each step in a simple and straightforward way. So grab your notepad and let’s get started!
Step 1: Prepare Your Tools
Before we dive in, let’s get everything ready:
- Open a Notepad: You’ll need this to copy and paste important information like URLs, pixel IDs, and tokens.
- Landing Page URL: Have the URL of the landing page you want to track ready.
- Facebook Business Manager: Ensure you have access to your Business Manager account.
Step 2: Access Your Landing Page
- Open Go High Level and navigate to your landing page.
- Copy the URL of your landing page and paste it into your notepad for easy access later.
Step 3: Open Facebook Business Manager
- Log in to your Facebook Business Manager account.
- Check for any restrictions or issues to ensure everything is running smoothly.
- Open Ads Manager and take a quick look to see if any active campaigns might be affected by your changes.
Step 4: Create a New Pixel
- In Ads Manager, click on “All Tools” and then “Events Manager”.
- Click “Data Sources” to see if there are any existing pixels.
- Click “Connect Data Sources” and select “Web”.
- Name your new pixel clearly (e.g., “Medspa Pixel 2”).
- Skip the next steps (like entering a URL or using partners) by clicking “Close”.
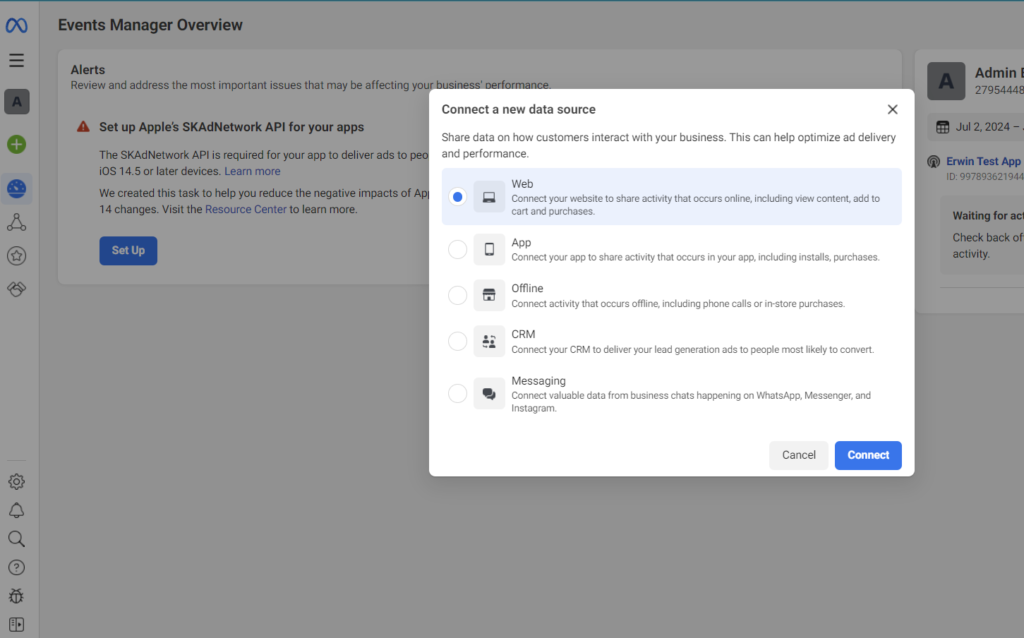
Step 5: Install the Pixel Code
- Click “Install Code Manually”.
- Copy the pixel code provided.
- Paste the pixel code into your notepad.
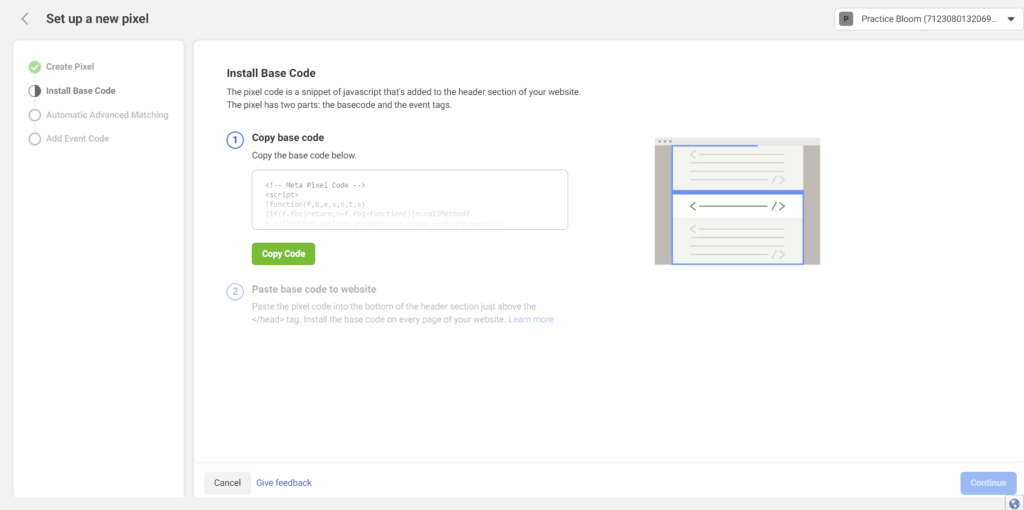
Step 6: Add the Pixel Code to Your Landing Page
- In Go High Level, go to your landing page settings.
- Paste the pixel code into the “Head Tracking Code” area.
- Save your changes.
- Repeat this process for your thank-you page and any other relevant pages.
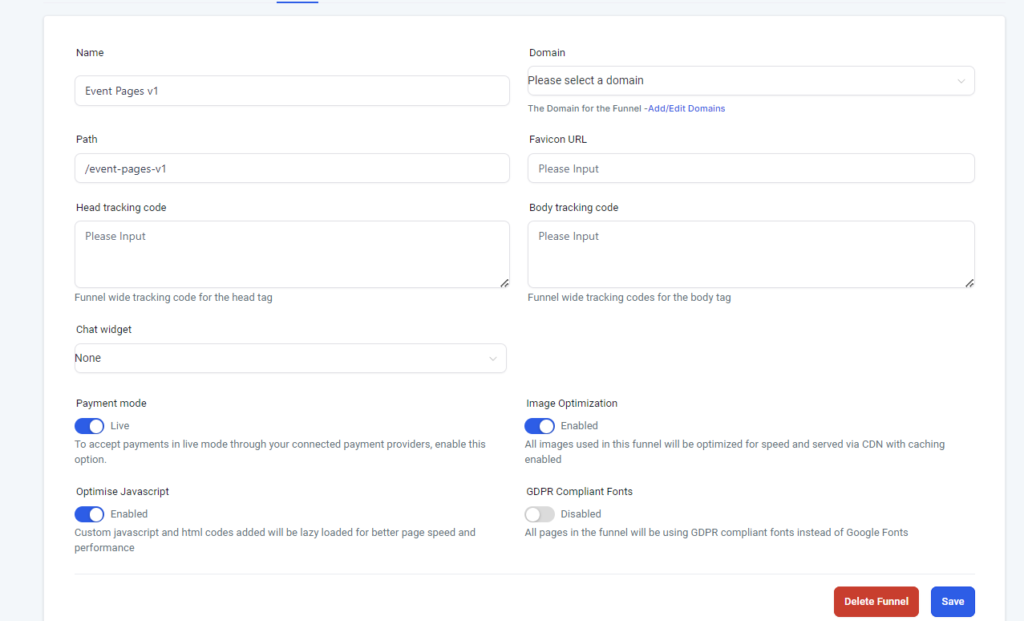
Step 7: Set Up the Conversion API
- In Facebook Events Manager, click “Setup” under Conversion API.
- Select “Set Up Manually”.
- Click “Continue” and choose the events you want to track (e.g., “View Content”, “Submit Application”, “Schedule”).
- Ensure all necessary fields (like email, name, and phone) are selected and show a green checkmark.
- Click “Continue” and then “Confirm Setup”.
Step 8: Generate and Use Access Token
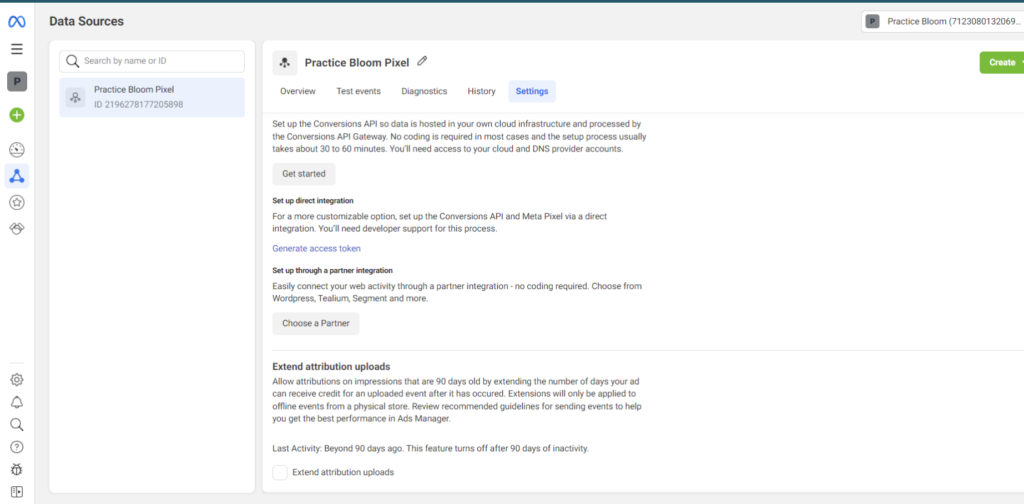
- Click “Generate Access Token” in the Conversion API setup.
- Copy the access token and paste it into your notepad.
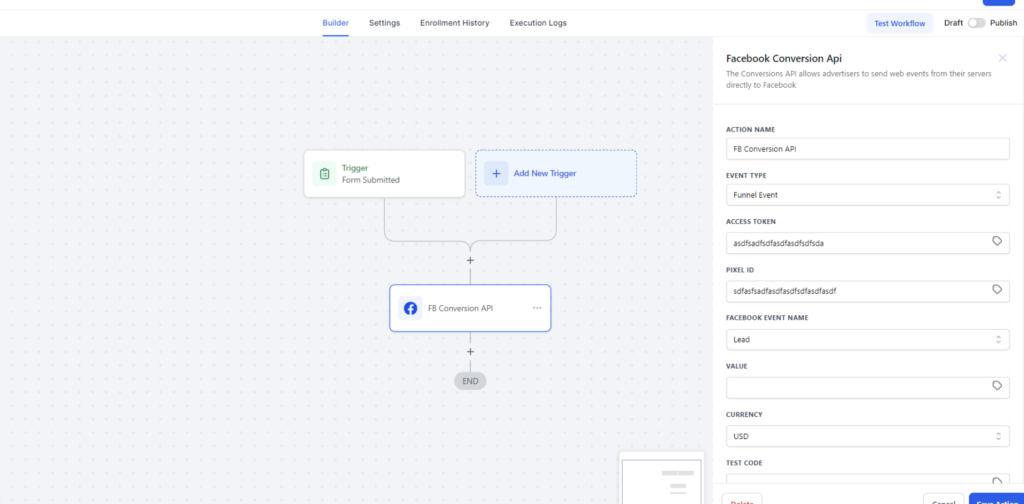
- In Go High Level, create a new workflow for form submissions.
- Add a trigger for “Form Submitted”.
- Enter the access token and pixel ID in the appropriate fields.
- Save and publish the workflow.
Step 9: Set Up Workflow for Scheduling
- Create a new workflow for scheduling appointments.
- Add a trigger for “Customer Booked Appointment”.
- Use the same access token and pixel ID as before.
- Save and publish the workflow.
Step 10: Test Your Setup
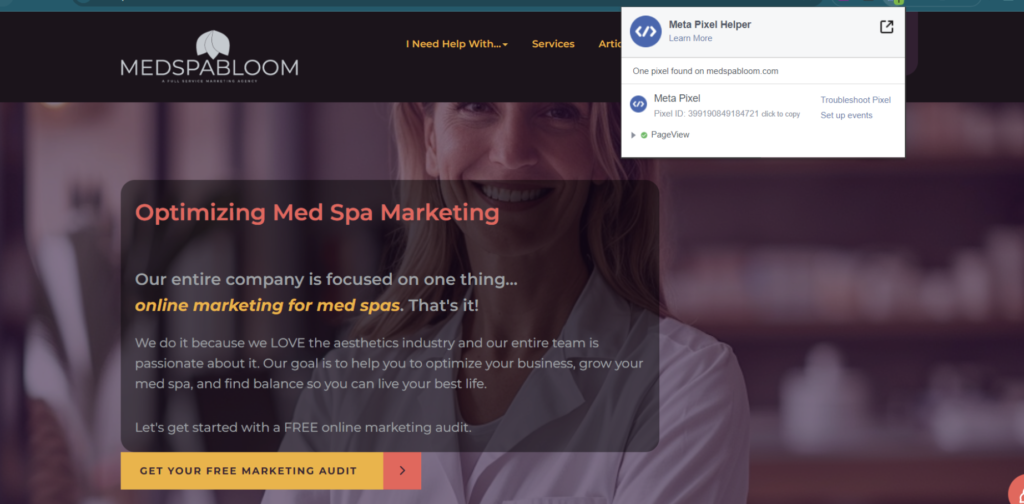
- Install the Facebook Pixel Helper extension on your Chrome browser.
- Go to your landing page and ensure the pixel is firing correctly.
- Submit a test form to verify that the pixel and API are tracking events properly.
Conclusion
And that’s it! You’ve successfully installed a Facebook pixel and set up the Conversion API for your medspa. This will help you track conversions and optimize your marketing efforts. If you have any questions or run into issues, don’t hesitate to reach out for help. Happy marketing!
Need Help with Medspa Facebook Ads?
At MedspaBloom, we run hundreds of campaigns every month exclusively for medspas. We know what works, how to work around Facebook’s strict rules for medspa services, and how to get quality new patient leads that book appointments and purchase services.
Schedule a FREE marketing consultation to see it if MedspaBloom is a good fit for your marketing needs
Share this content:
